Onto the quilting. I've been admiring the whole straight line quilting thing for a while now. It gives lovely texture without detracting from the magic of the fabric or the blocks - great for maybe boys quilts, or those that are not flowery or girly. And after seeing this picture on Tallgrass Prairie Studio's blog (check the sidebar) - I decided it was time to bite the bullet and give it a go.
 |
| Photo borrowed from Tallgrass Prairie Studio blog |
After all, it is only straight lines, isn't it?
Well, this is where the problem is... I have developed a paranoid phobia of straight lines... I just can't really explain it. With FMQ there is no right or wrong way of doing it. If your design doesn't quite look like the original, it doesn't matter - no body else knows quite what the original looked like anyway... BUT everyone knows what straight lines look like - the emphasis is on STRAIGHT. I don't do stitch in the ditch and have never done cross hatching - what straight on the bias... are you crazy or something?
So away I went... found the as yet unused walking foot (OK I've had my machine for 3yrs almost) and started off OK, but as the quantity of lines increased, so did the shifting of the top layer of fabric towards the bottom of the quilt... especially on the striped borders that have a serious lean to them.
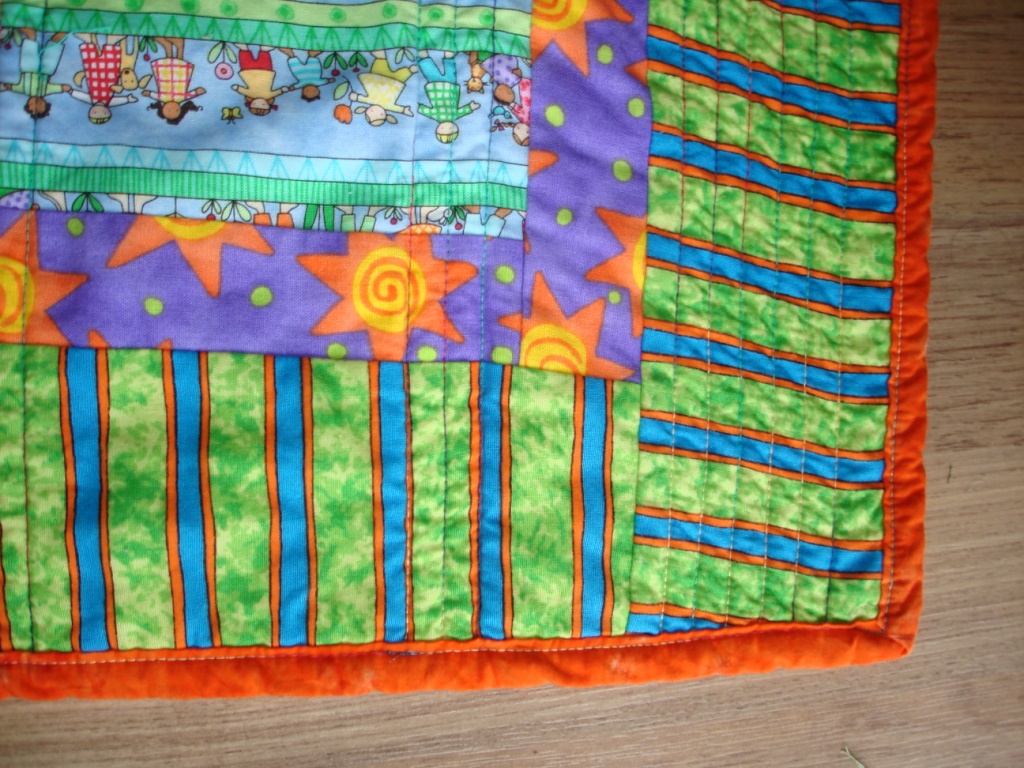 |
| This is the worst corner - unbelieveably the corner is a right angle - however the stripes tell the story... bugger! |
So, I emailed the lovely Jacquie from Tallgrass Prairie Studios, and asked some advice. This is what she shared:
"... one basting question...do you tape your back down to the floor before you baste making sure it's taut? Some people don't, and that can make a difference with shifting.
A couple of things might help at least for the next quilt. I usually start in the center and then quilt out to the edge...back at the center and then out to the other edge. When quilting a whole quilt vertically, I try to alternate lines quilting one top to bottom and then the next bottom to top. Also, when I'm in the process of quilting I periodically measure from my quilting line to the edge to see if I'm maintaining a perpendicular line. You'd be surprised how a 1/16th of an inch off can multiply across a large quilt. I make adjustments as I go. The other thing I thought about is if you're using seams as a guide, they may not be totally vertical...as much as we try and they look that way, they may not be and that may be why when you got to the border they looked off. Before using a seam as your guide...measure from that seam to the edge of the quilt in multiple places to make sure it runs straight up and down the quilt.
Also, what stitch length are you using for your quilting. Sometimes too small a stitch length can cause problems. I sometimes straight line quilt with a stitch length between 2.6 and 3.0 depending on the look I want."
She is lovely!
 |
| The top - and yes, all those lumpy/puckery bits don't really sit well... I am undecided what to do about it - if do anything at all. Did a very poor attempt at a machine binding... that didn't turn out so well either. |

 |
| The back actually looks better quilted than the front. |
 |
| And incase you hadn't seen it often enough already, the front again. |
I've whizzed through my books... including the Modern Quilting variety... googled the topic, and you know, I can't really find any conclusive advice. Much of it contradicts what other people say... hmm... who would have thought straight lines could be so confusing?
2 comments:
I've had similar problems to you Suz! I agree about the things Jacquie said too! Good luck for next time!
How frustrating!!!!!
Post a Comment